vue-element-admin 리뷰
Layout
components folder

components/index.js
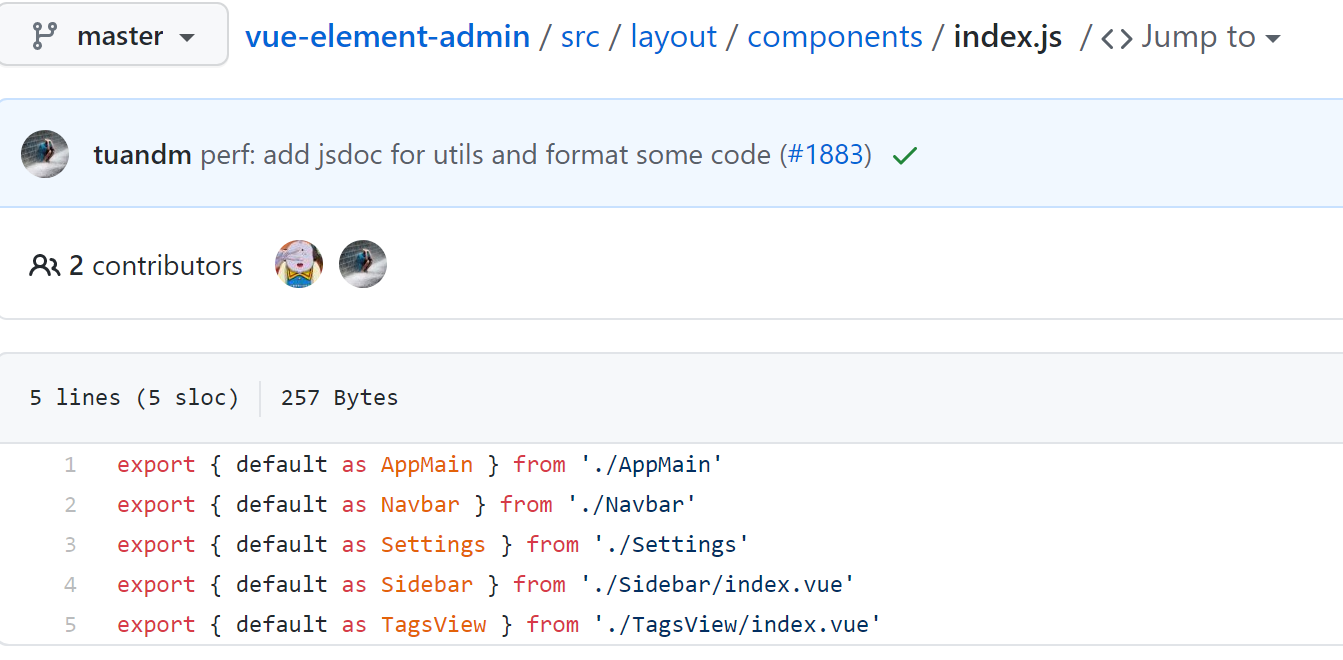
{AppMain, Navbar, Settings, Sidebar, TagsView}
을 익스포트하게 된다.
이는 나중에 layout/index.vue에서
import { AppMain, Navbar, Settings, Sidebar, TagsView } from './components'에서 임포트 되어 사용된다.
layout/index.vue
Vue.js 문법
:class="classObj": Object Syntax, true 이면 포함, false 이면 제외:class는v-bind:class의 축약형
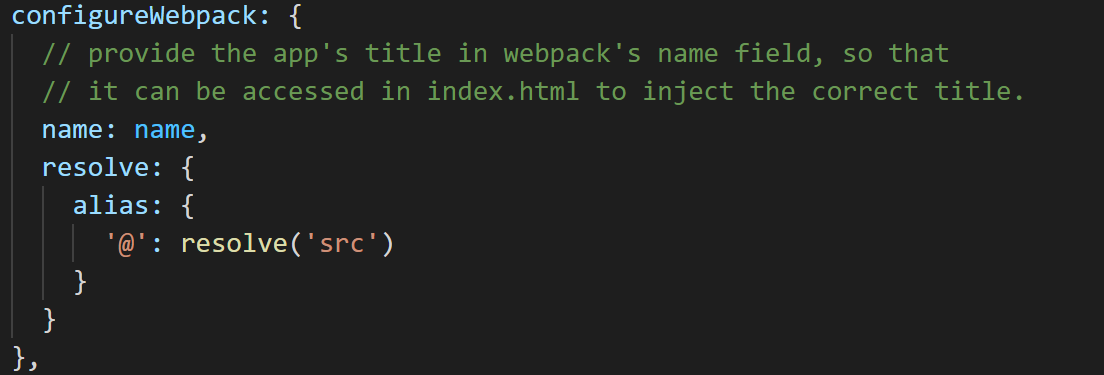
- import RightPanel from '@/components/RightPanel'
@: Webpack's alias, vue.config.js에src = @로 정의되어 있으므로 src/components/RightPanel
mixins: [ResizeMixin],: ResizeMixin을 사용, ResizeMixin에는 Resize를 위한 메소드가 포함되어 있음- vuex
...mapState({: ...는 Set 이나 List를 해체한다는 뜻이다(괄호를 벗겨낸다는 뜻).this.$store.dispatch('app/closeSideBar', { withoutAnimation: false })
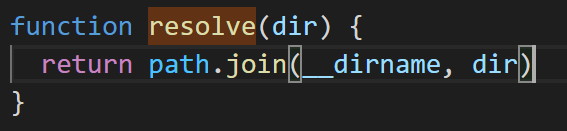
Vue.js 에서는 따로 webpack.config.js 파일이 없는데, vue.config.js 파일에 src 폴더의 alias를 @로 정의하는 부분이 정의되어 있다. resolve는 __dirname과 src 폴더의 경로를 합쳐주는 함수이다.
vuex와 mixins에 대한 공부가 필요!
mixins
- Vue 컴포넌트의 모든 옵션 포함 가능
- Mixins 안의 모든 옵션이 해당 컴포넌트에 포함됨
vuex
vue-element-admin에서 사용하는 Vue 버전은 아쉽게도 버전2이다. 따라서 Vuex의 버전은 3이다. 너무 최신 버전만 사용하려고 하지 말자~ ^^
$ vue create vuex-test : Version 2를 선택한다.
$ yarn add vuex : Version 3가 설치된다.
Vue.use(Vuex)
패키지 매니저(npm, yarn)으로 Vuex를 설치했을 경우 다음과 같이 명시적으로 Vuex를 플러그인으로 등록해야 한다.
import Vue from 'vue'
import Vuex from 'vuex'
Vue.use(Vuex)
Promise
Vuex는 Promise가 필요하다.
$ yarn add es6-promise # YarnVuex가 들어가는 모든 코드에, Vuex를 사용하기 전에 다음을 추가한다.
import 'es6-promise/auto'Error
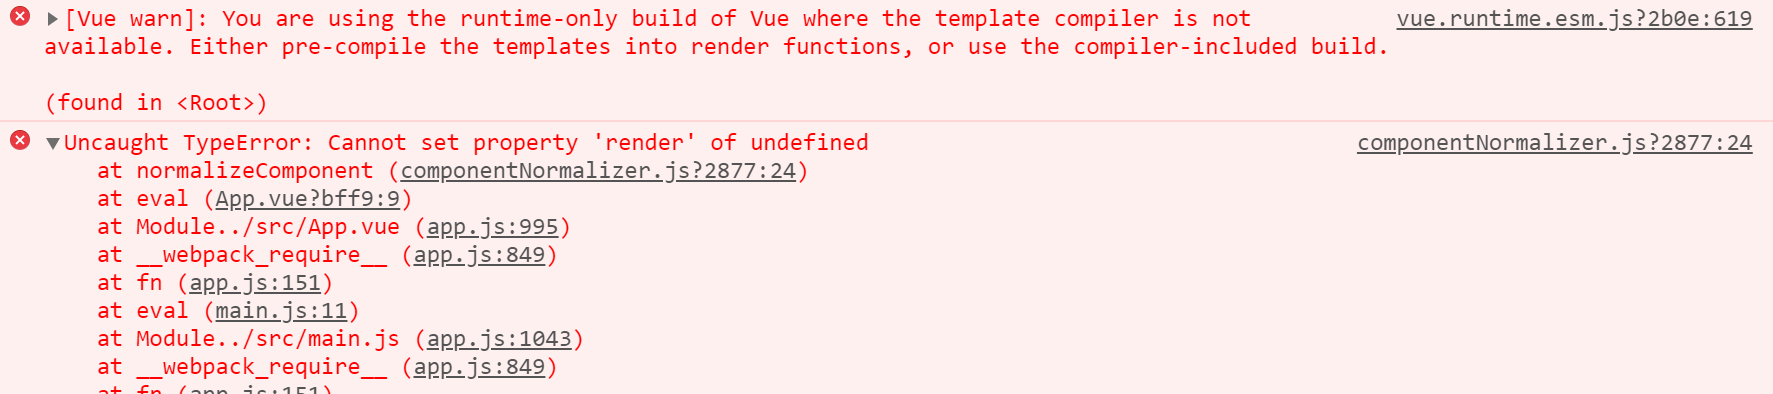
두 가지 에러가 떴다.
- You are using the runtime-only build of Vue ...
- Uncaught TypeError: Cannot set property 'render' of undefined
가장 간단한 store
import Vue from 'vue'
import Vuex from 'vuex'

Vue.use(Vuex)

const store = new Vuex.Store({
  state: {
    count: 0
  },
  mutations: {
    increment (state) {
      state.count++
    }
  }
})
스토어의 특징
- 스토어는 Vuex.Store(S는 대문자)로 생성
- state, mutations 두 개의 특성이 있음
- state: count(초기값 0)으로 구성
- mutations: 위의 count의 값을 변형하는 increment, decrement 함수 두개로 구성
- 각각의 함수는 state를 인수로 받아서, state.count를 변형시킨다.
mutation 커밋하기
- mutations의 메소드를 실행시키기 위해서는 store.commit('mutation이름')을 이용한다.
- 예를 들어 store.commit('increment')
- 상태 변화는 오로지 mutation을 commit함으로써만 발생한다.
- commit을 할 때는 payload와 함께 commit할 수도 있다. 예) store.commit('mutation명', payloadObj)
- 그러면 처음에 Vuex.Store 생성자로 스토어를 생성할 때 mutations의 정의에서도 payload를 넣어줘야 한다.
- mutations: { increment(state, payload) { ... } }
- 그러면 처음에 Vuex.Store 생성자로 스토어를 생성할 때 mutations의 정의에서도 payload를 넣어줘야 한다.
object의 prop을 변경하는 방법
두 가지 방법이 있다.
- Vue.set 사용하기: Vue.set(obj, 'newProp', 123)
- Object spread(펼침) syntax + 새로운 obj를 생성하여 치환: state.obj = { ...state.obj, newProp: 123}
간단한 Action의 예
const store = new Vuex.Store({
  state: {
    count: 0
  },
  mutations: {
    increment (state) {
      state.count++
    }
  },
  actions: {
    increment (context) {
      context.commit('increment')
    }
  }
})- 비동기를 사용할 수 있다.
- context를 인수로 해서 context.commit(mutation)을 한다.
- 직접 store.commit을 하지 않는다.
Argument Destructuring
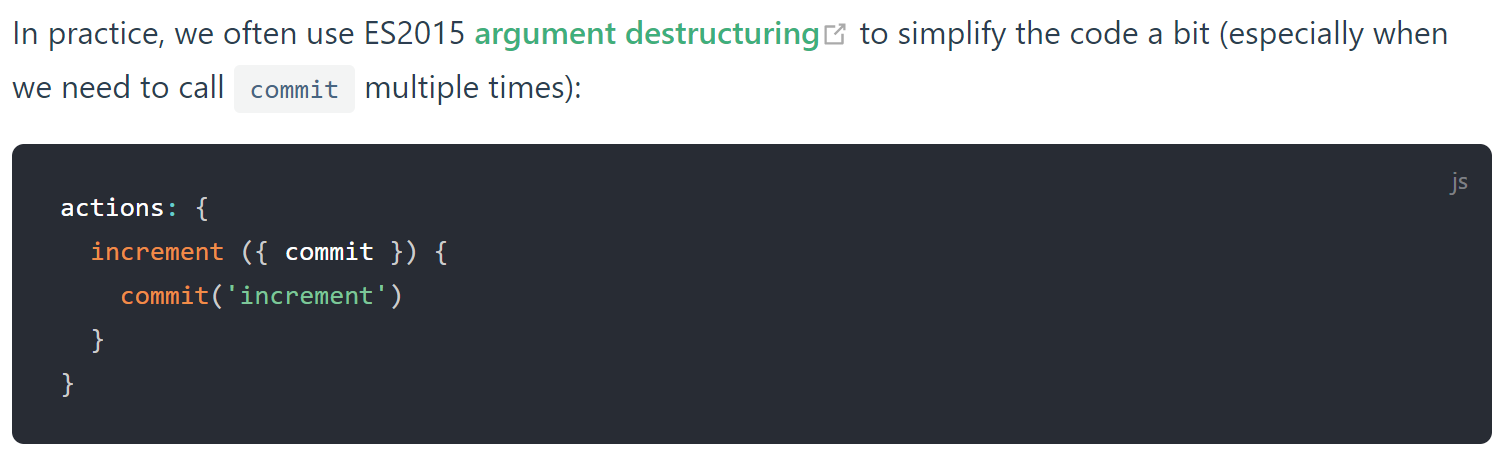
- 인수: context → { commit }
- 함수본문: context.commit('increment') → commit('increment')
Action Dispatch하기
action은 store.dispatch('action명')으로 실행된다.
store.dispatch('increment')Async Action
actions: {
  incrementAsync ({ commit }) {
    setTimeout(() => {
      commit('increment')
    }, 1000)
  }
}
// dispatch with a payload
store.dispatch('incrementAsync', {
amount: 10
})
// dispatch with an object
store.dispatch({
type: 'incrementAsync',
amount: 10
})Vue Component에서 Action 디스패치하기
두 가지 방법이 있다.
- this.$store.dispatch('액션명')
- 컴포넌트 method에 매핑하기
import { mapActions } from 'vuex'
export default {
// ...
methods: {
...mapActions([
'increment', // map this.increment() to this.$store.dispatch('increment')
  // `mapActions` also supports payloads:
  'incrementBy' // map `this.incrementBy(amount)` to `this.$store.dispatch('incrementBy', amount)`
]),
...mapActions({
  add: 'increment' // map `this.add()` to `this.$store.dispatch('increment')`
})
}
}
```
AppMain.vue
모르는 것들
- section 태그
- transition 태그
- keep-alive 태그
- $store.state.tagsView.cachedViews
- scss 문법
- .fixed-header+.app-main
- .el-popup-parent--hidden
o
menu-item(route) 1개 더 추가하기
- router/index.js
- constantRoutes에서 /d9ashboard 부분을 복사
- views/dashboard 폴더 복사(dashboard component)
api: mock/index.js 파일 수정- robots/index.vue: fetchList() → api/article.js: fetchList()
- url: '/vue-element-admin/article/detail'
- method: 'get'
- robots/index.vue: fetchList() → api/article.js: fetchList()
- mock/article.js 의 해당 url과 method 조합의 로직에 대응됨
- 따라서 mock/article.js 를 복사하여 mock/robot.js 만들기
- api/article.js 복사하여 api/robot.js 만들기
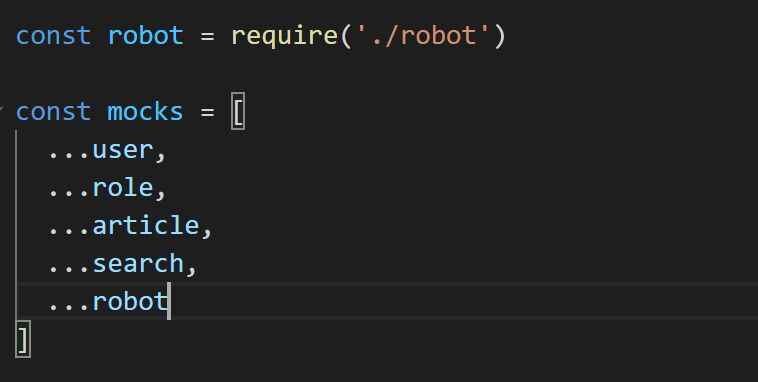
mock/robot.js
'Vue.js' 카테고리의 다른 글
| Axios - Access to XMLHttpRequest at ... has been blocked by CORS policy: No 'Access-Control-Allow-Origin' header is present on the requested resource. (0) | 2022.04.29 |
|---|---|
| Uncaught SyntaxError: Cannot use import statement outside a module (0) | 2022.04.29 |
| [Vue.js] Admin 페이지 만들기 (0) | 2021.07.10 |
| [Vue.js] Element-Plus <el-menu> 스타일링이 안되는 문제 (0) | 2021.07.09 |
| [Vue.js] Vue.js의 로고 컬러 (0) | 2021.07.08 |